(e) Remove the eye nuts and capscrews
that secure the transom chord to the end arch.
(d) Remove the door winch and tran-
som chord assembly.
(2) To replace the transom chord strut,
perform the following:
(a) Remove the self-locking nut (6, fig.
3-32) and capscrew (4) that secure the strut
(6) and gusset plates (2) to the transom chord
(8).
(b) Remove the screw from the gusset
plates and transom chord strut.
(c) Remove the transom chord strut.
(d) Install the transom chord strut in
reverse order of removal.
3-22. Guy Assembly
Remove and install the guy assembly (para 3-
12) .
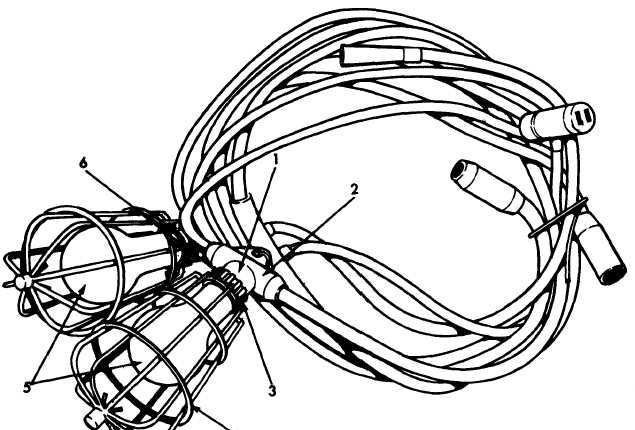
3-23. Wiring Harness Assembly
a. Lamp Guard, Removal and Installation.
(1) Remove the setscrew (3, fig. 3-33)
that secures the lamp guard collar (6) to the
lamp socket tee (2).
(2) Remove the lamp guard (4) from the
lamp socket (1).
b. Circuit Breaker, Removal and Installation.
Remove and install the circuit breaker (para
3-14) .
c. Lighting and Outlet Assembly, Removal
and Installation. Remove and install the light-
ing and outlet assembly (para 3-14).
(8) Install the transom chord assembly in
reverse order of removal.
8340-207-14/3-33
3 Lamp guard setscrew
4 Lamp guard
5 Lamp
6 Lamp guard collar
Figure 3-33. Lighting and outlet assembly.
3 - 3 9