
TM 10-5410-221-14/1
(a) Position parts to be sewn together and
sides, and bottom of the air-lock chamber. The body
temporarily secure the position of the parts. Sew parts
assembly consists of a fabric body with various fabric
together (fig. 9-6) with five to nine stitches per inch (2.54
attachment and reinforcing components installed.
b. Rernoval. Removal of fabric body assembly
cm). Use single needle or double needle stitching as
noted on removed parts.
consists of removing the other components of the air-
lock chamber as described in paragraphs 9-2 and 9-3.
c. Disassembly. Disassemble fabric body assembly
NOTE
as required for replacement of damaged components as
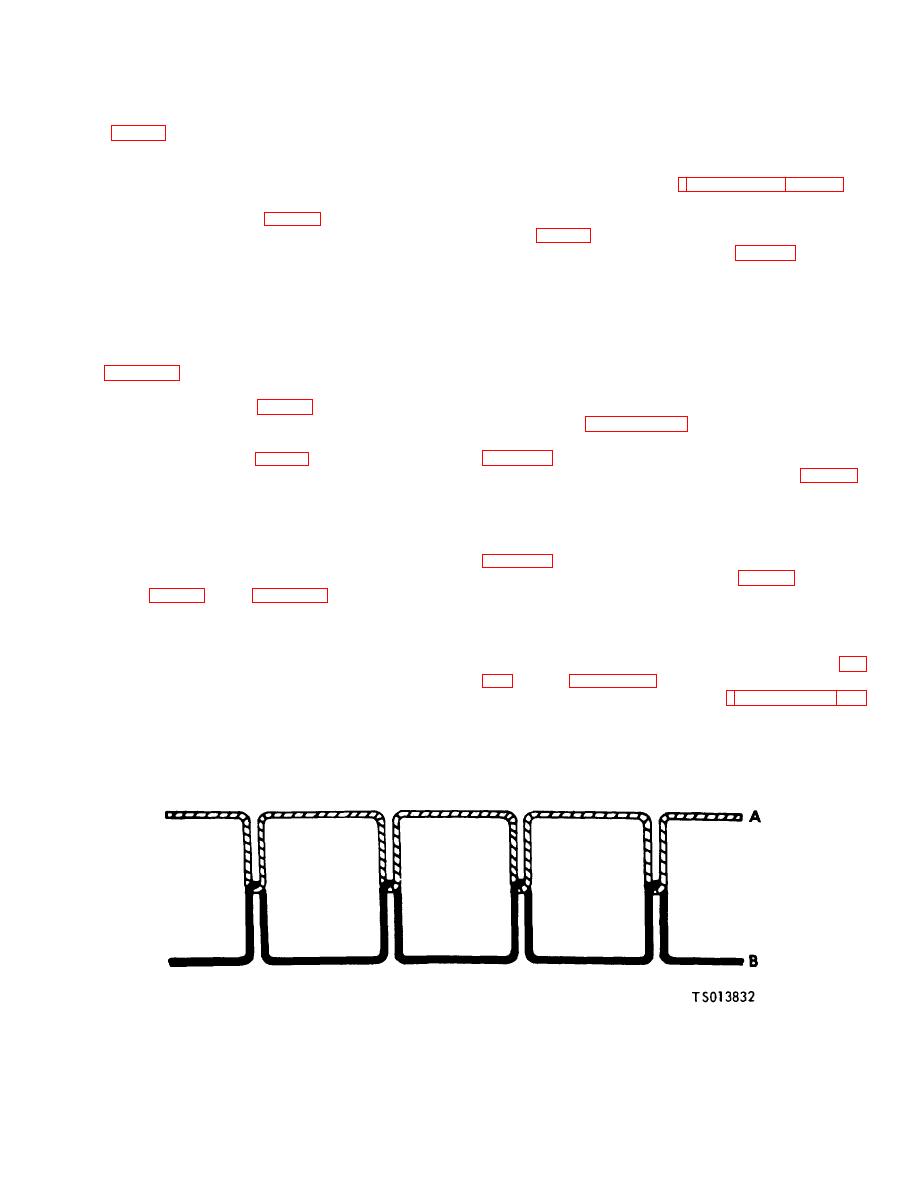
This type of stitch 301 (fig. 9-6) shall be
follows (fig. 9-7).
formed with two threads: one needle
(1) Untie and remove cord (1, fig. 9-7). Peel tie
thread, A, and one bobbin thread. B. A
patch assemblies (2), bow holding snap assemblies (3),
loop of thread A shall be passed through
light and fixture patch assemblies (4), and reinforcing
the material and interlaced with thread
patches (5) from body cloth (11) as described above.
B. Thread A shall be pulled back so that
(2) Cut stitches and remove tent pin patch
the interlacing shall be midways
assemblies (6), ground aprons (7), electrical patch
between surfaces of the material or
assemblies (8), slider half of zippers (9), and hook fabric
materials being sewn.
fastener tape (10) from body cloth (11) as described
above.
air-lock chamber components.
d. Repair. Repair damage to fabric body assembly
(2) Cement end panel (12, fig. 9-3) to door assembly
as described in paragraph 5-7.
(13) and cement reinforcing tape (7) to end panel (12)
e. Assembly. Assemble fabric body assembly using
and door assembly (13).
(3) Install gaskets (4, 5, 6, fig. 9-3) on valve (3) using
(1) Install hook fabric fastener tapes (10, fig. 9-7),
adhesive (140, Dow Corning Corp., Midland, Michigan).
slider half of zippers (9), electrical patch assemblies (8),
Install anti-back draft valve (3) on door assembly (13)
ground aprons (7), and tent pin patch assemblies (6) on
(with valve counter-weight up) and secure with
body cloth (11) and secure by sewing as described
lockwashers (2) and screws (1).
above, using size F-F olive green thread, and observing
(4) Position blackout curtain components together
and secure by sewing as described above.
f. Installation. Install end panel and door
(2) Cement reinforcing patches (5, fig. 9-7), light and
fixture patch assemblies (4), bow holding snap
assembly (10, fig. 9-1) using figure 9-1 as a guide and
assemblies (3), and tie patch assemblies (2) on body
observing the following.
cloth as described above. Tie cord (1) in tie patch
(1) Install blackout curtain assemblies over door
assemblies (2).
assembly windows as described above.
(2) Engage and close zipper between end panel and
door assembly (10) and fabric body assembly
installation procedures described in paragraphs 9-2 and
(10) and fabric body assembly (11).
9-3.
9-4. Fabric Body Assembly
a. General. The fabric body assembly provides top,
Figure 9-6. Stitch Type 301 (TS 013832)
9-8
