
TM 10-5410-221-24
b. Removal.
Remove the distribution box
(4) Remove bolts (94) and clip nuts (95)
which secure relay mounting bracket to distribution box.
assembly using figure 6-22 as a guide and observing the
(5) Remove damaged nut plates (97) by
following.
removing rivets (96).
(1) Remove
electrical
wiring
harness
assemblies according to procedures outlined in
d. Assembly.
Assemble distribution box in
(2) Disconnect all shelter harness assemblies
reverse order of disassembly using figure 6-22 as guide
and wires running to and from box using section III as a
and observing the following.
guide and referring tables 6-1, and 6-2.
(1) Replace nut plates (97, fig. 6-22) and
secure with rivets (96) per paragraph 2-22 c.
(3) Remove bolts and washers used to
secure the distribution box to the shelter walls and
(2) Replace clip nuts (95) and bolts (94) on
ceiling. Remove the distribution box.
distribution box.
(3) Replace fastener receptacle (91) and
c. Disassembly. Disassemble distribution box as
required to replace damaged parts according to
fastener stud (92) in door assembly hole and replace pin
sequence of numbers assigned to figure 6 22, and
to secure.
observing the following.
(4) Clean label area of distribution box with an
(1) Remove screw (73, fig. 6-22), washer (74)
approved cleaning solvent to remove all traces of
and remove lamp retainer ring (75 gasket (76), rivet (77)
adhesive and remove protective backing from labels (89,
and nut plate (78 Remove lamp (79).
90). Press firmly into position on distribution box and
(2) Remove shelf adhesive labels (81, 90) by
smooth out any wrinkles or air bubbles under label.
peeling from surface of distribution box.
(5) Place nut plate in position and secure with
(3) Remove fastener stud (92) frog door
rivet (77). Replace lamp (79), gasket (76), retainer ring
assembly by removing pin from stud (92). Remove
(75) and secure with washer (74) and screw (73).
fastener receptacle
(91) from distribution box by
removing rivets.
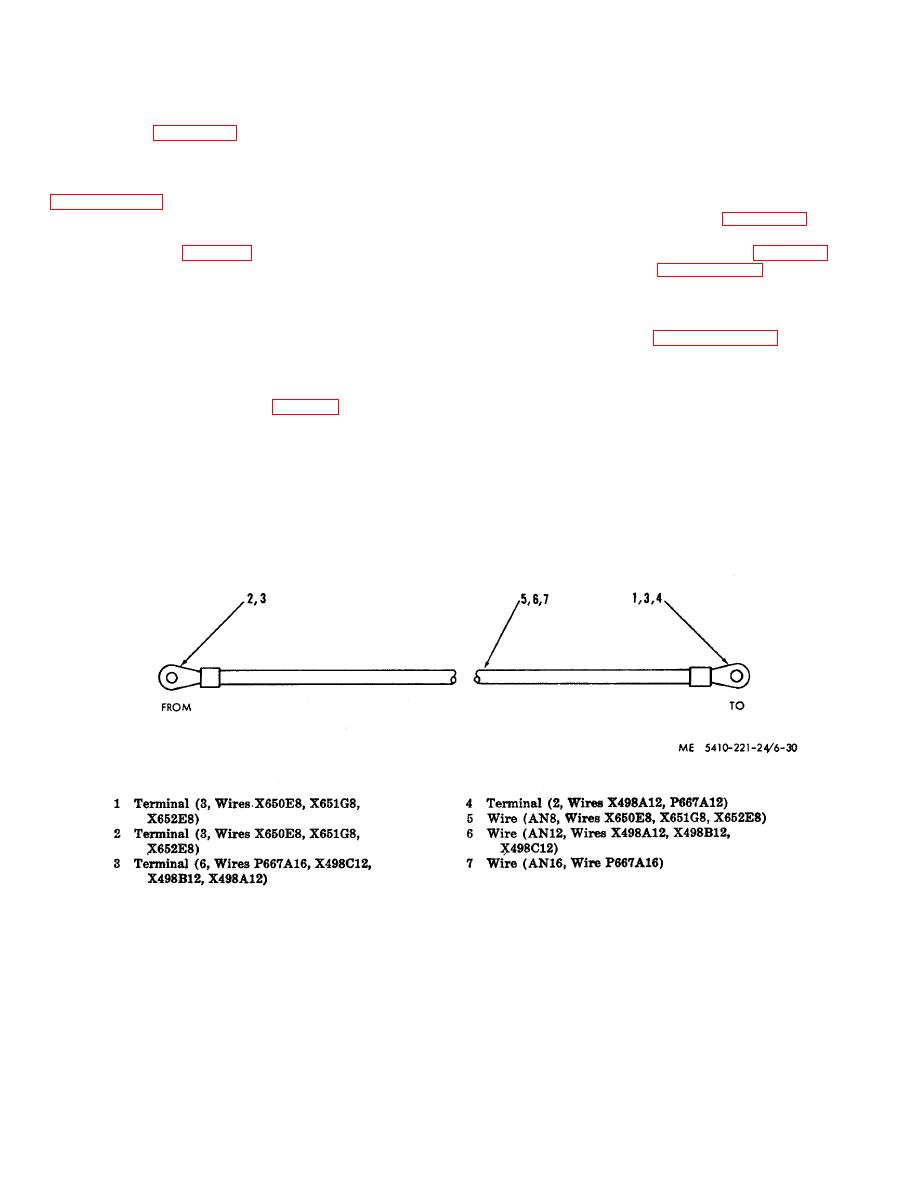
Figure 6-30. Wire and terminal assemblies.
6-57

