Figure 3–8. Securing arch to ground.
eye of the transverse line. Pull down to tighten
and secure the line with a knot (B, fig. 3-12).
(7) Pass the transom chord securing
straps under the transom chord and secure
them to the D-rings (C, fig. 3-12).
c. Intermediate Section.
(1) Determine the side of the tent on
which the windows are to be located. All win-
dows must be on the same side of the tent in
order for the windows in the tent liner to
match.
(2) Place a folded intermediate section,
window side down, on the ground, six feet
from the portion of the tent frame that is to
be covered.
(3) Attach two ropes, each approximately
40 feet long, to the securing straps on the one
end of the intermediate section, throw the ropes
over the tent frame, making sure the fabric
overlaps both intermediate arches by approxi-
mately six inches (fig. 3-13).
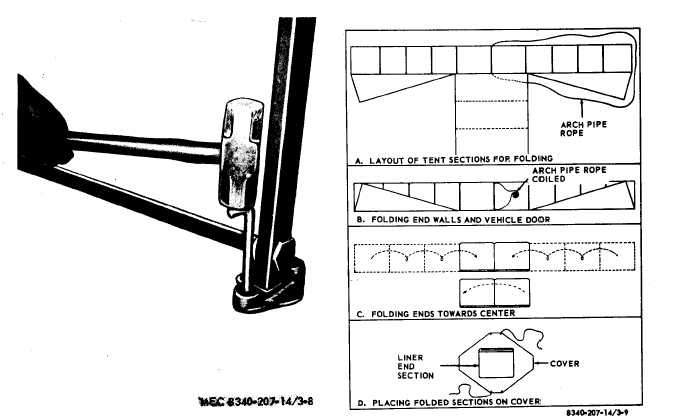
Figure 3-9. Folding and packing tent end sections.
Note. If ropes 40 feet long are not available
use ropes issued with intermediate tent sections and/or
cover tie ropes.
(4) Working on each side of the tent, pull
the sod cloth and purlin flap under the lower
purlin, and engage and secure the hem rope
as described in a(4) and (5) above.
(5) Working at each side of the tent si-
multaneously, secure as described in a(6)
above, the transverse line, that runs through
the sleeve on the exposed edge of the section.
(6) Working outside the tent, pass the
transverse line that runs through the sleeve
on the overlapping edge through the slit in the
tent end section. If the tent end section is prop-
erly installed, the slit will be located under the
lower purlin in the portion of the-end section
that is overlapped by the intermediate section.
Also pass through this slit the securing strap
that is attached to the intermediate section (A,
fig. 3-14). Working inside the tent, at each
3-10