TM 10-7360-211-13&P
Change 7 4-8.1
WARNING
Protect your eyes and hands from possible glass fragments from the light bulb. Wear
hand and eye protection. Failure to do so may result in serious injury to personnel.
REMOVAL
1.
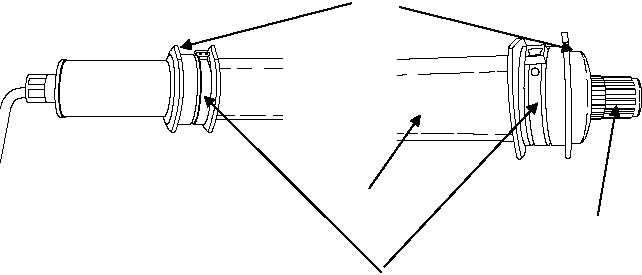
Remove the cable tie (1) from the smaller end cap (2) located on the opposite handle. Do not remove handle.
2.
Remove strain relief nut (3) and sleeve from strain relief then remove end cap (2) by gently prying off tube (4)
with a screwdriver or similar tool.
NOTE
Do not loosen jam nut.
3. Carefully remove shock (1), using care not to pull on the power cord (2).
4.
Grasp the bulb puller (3) and gently, but firmly, pull the bulb (4) out of the socket and remove from the tube (5).
Take care since the bulb (4) is tightly wedged in the socket.
5.
Remove bulb puller (3) from old bulb (4) and dispose of bulb (4) properly. If old bulb (4) is not broken, there is a
vacuum inside and breaking the bulb (4) can be dangerous.
6. Clean inside of the tube (5) if necessary.
7. Install the bulb puller (3) on the new bulb (4) as shown. This will assist in removing the bulb (4) the next time.
8.
Slide the new bulb/bulb puller (3) into the tube (5) and align so the pins (6) will intersect with the receiver holes in
the socket.
9. Gently push the bulb (4) down into the socket and seat the pins (6) into the receiver holes.
10. Plug light in and activate switch. Ensure bulb (4) is seated properly and that it illuminates.
11. Replace shock (1), using care not to pull on the power cord or screen.
2
3
4
Opposite Handle
1


