
TB 9-2320-360-13&P-2
RIGHT-SIDE FIREWALL ARMOR REPLACEMENT - CONTINUED
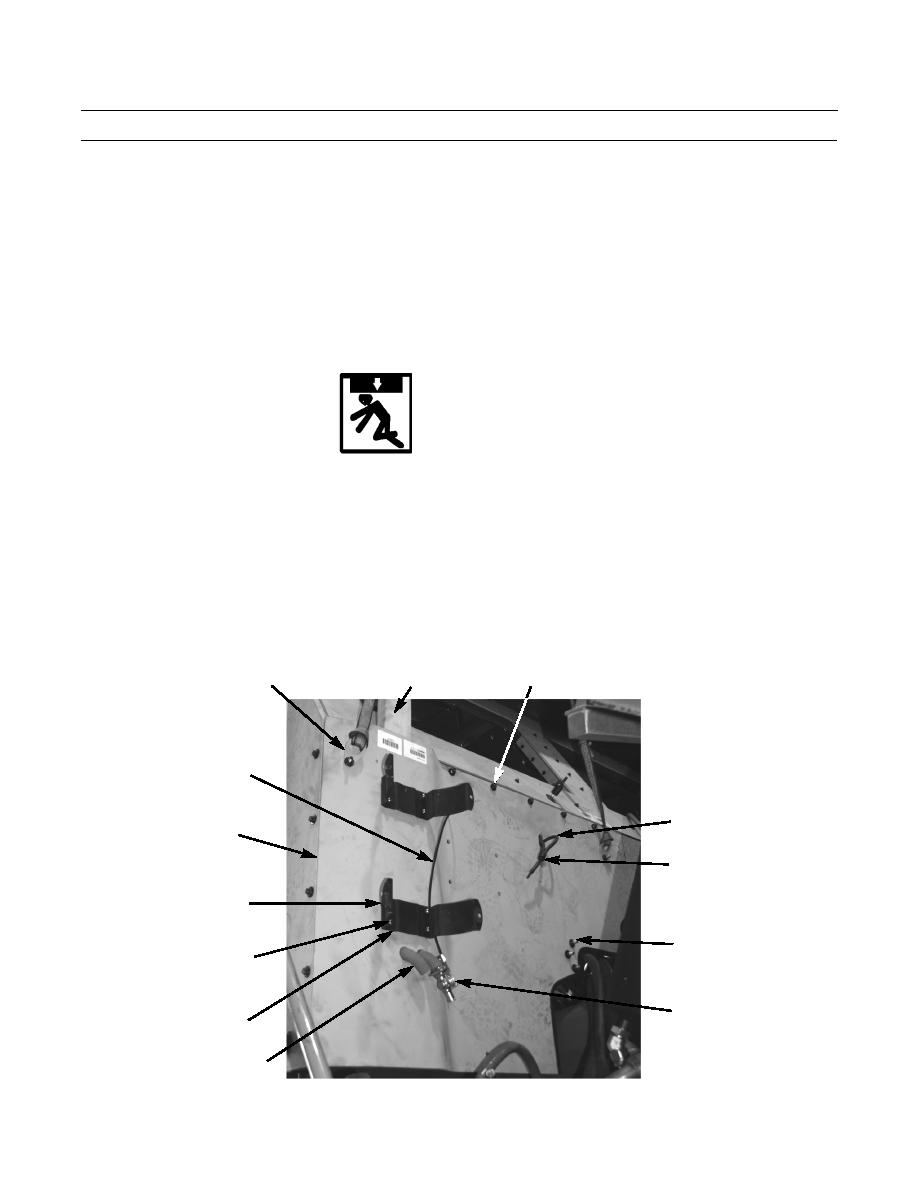
0021 00
REMOVAL - CONTINUED
2.
Disconnect heater hose and heater control valve (11) from elbows at right firewall (TM 9-2320-360-20).
3.
Disconnect heater control cable (18) from heater control valve (11).
4.
Insert 2x4 block of wood (2) behind right firewall and power steering reservoir brackets.
5.
Remove 8 locknuts (14), washers (15), 2 power steering brackets (16), and 24 washers (13) from right firewall (16). Dis-
card locknuts.
6.
Remove three locknuts (7), washers (8), bolts (9), and washers (10) from right firewall (17). Discard locknuts.
7.
Attach sling and lifting device to lifting eyes (1) on right firewall (17).
8.
Remove five locknuts (3), washers (4), and washer hose clamp (6) from right firewall (17). Discard locknuts.
WARNING
Use extreme caution when handling heavy parts. Provide adequate support and use assistance during proce-
dure. Ensure that any lifting device used is in good condition and of suitable load capacity. Keep clear of
heavy parts supported only by lifting device. Failure to follow this warning may cause injury or death to per-
sonnel.
NOTE
The right firewall weighs 113 lb (51 kg).
While removing right firewall, feed heater hose elbows (12), heater control cable (13), and washer
hoses (5) through right firewall.
9.
Using lifting device, remove right firewall (17) from vehicle.
2
3,4
1
18
5
17
6
16
7,8,9,10
14,15
11
13 (HIDDEN)
12
417-141
0021 00-2
